
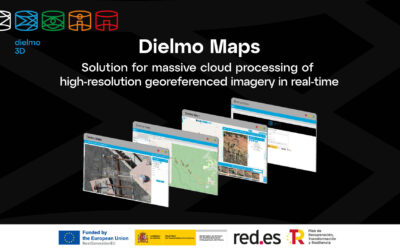
dielmo maps
Dielmo Maps stands out as the most affordable cloud-based SaaS option for building web geoportals and sharing them, whether for internal or public use. It provides a comprehensive set of features, including content management, tools for visual inspection and custom report generation, cloud-based spatial data processing, artificial intelligence, access to real-time sensors, as well as LiDAR data, among other capabilities.
access the platform in your preferred region
solution aimed at

public agencies
Any public agency managing geospatial data and wishing to share it publicly or privately. This includes municipalities, provincial governments, cartographic institutes, environmental agencies, transportation, emergency services, etc.

engineering firms
Infrastructure maintenance, infrastructure inventory, visual asset inspection, engineering firms, data capture companies, any business managing geospatial data.

agriculture
Easy access to vegetation indices created from satellite images or drone flights on different dates for crop yield analysis.
serves for

viewing geospatial eata on the web
Quick access to all geospatial information in a simple way through the web without the need for other specific software, with secure data access and control over the data published at any given time.

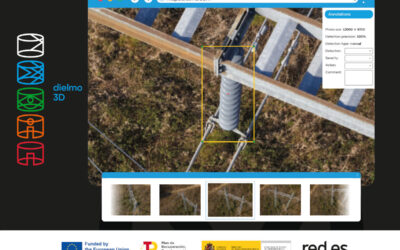
visual inspection of images or videos
A perfect tool to speed up visual inspection with high-resolution images or georeferenced videos. Automatic and customized report generation. Object detection with artificial intelligence.
some functionalities
search panel
Allows searching for points of interest, cadastral code, tree view, or street names.
elevation retrieval
Obtain elevation at any point on the map with a customized and accurate elevation model.
360º photos
Access 360º photos uploaded by the user or from Google Street View for visual inspection purposes.
cadastral information
Quickly access cadastral information by clicking on a point or searching by cadastral reference.
coordinates
Get the exact coordinates of a point on the map or navigate to desired coordinates.
measurements
Perform linear or area measurements on the map. Also, measure on LiDAR profiles or in 3D.
sensor access
We can integrate third-party APIs to retrieve information from different sensors and display them on the map based on their value.
online LiDAR data
Quickly and easily access LiDAR data from different dates through profiles and 3D visualization.
visual inspection
Advanced visual inspection tool to analyze and generate customized reports from high-resolution images and videos.
components

content manager
The content manager allows customization and creation of new layers within Dielmo Maps, creating and editing new scenarios, modifying their visibility, managing data access through roles, permissions, and administration zones, and connecting to existing databases to display layers.

LiDAR viewer
The advanced LiDAR viewer component allows to select an area and visualize it through LiDAR data obtained on one or several different dates, using profiles or in 3D, with measurement tools, different visualization styles, and options to import and export data in LAS format.
The new version of Dielmo Maps is the result of our latest research project. DIELMO 3D has benefited from project 2021/C005/00146211, subsidized by the Ministry of Digital Transformation, through the entity Red.es. The aim of this project was to address complex societal challenges through the experimental development of solutions supported by various digital technologies, such as cloud computing, massive data processing technologies, and artificial intelligence.
Project Title: Solution for real-time cloud-based massive processing of high-resolution georeferenced photographs.

latest blog posts
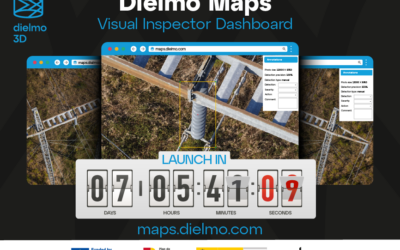
Countdown for the launch of the Dielmo Maps Saas platform at the Energy Drone & Robotics Summit, June 2024, Houston
Dielmo Maps, the new cloud-based SaaS platform for processing high-resolution geospatial data, is about to be made available to the public. This launch will take place at the Energy Drone & Robotics Summit in Houston, from June 10th to 12th 2024, where we will be...
Differential Factors that make our new platform Dielmo maps unique
At DIELMO 3D, we have been working for over 15 years in developing technologies for the publication of geospatial data through the internet. For example, in 2010, we already had our technology for publishing LiDAR data through a profile and 3D tool in a browser, which...
Introducing Dielmo Maps as a SaaS offering during GEO WEEK 2024
One more year Dielmo 3D will participate in GEO WEEK, we are present at GEO WEEK since 2010. It will be at the Colorado Convention Center, Denver (USA). Dielmo 3D will unveil the latest version of Dielmo Maps, our new cloud-based SaaS service that provides real-time...